


Mechanism of a light sensor for LEGO® MINDSTORMS® NXT
 |
This is a "light sensor", which are parts to take in light. There are two round transparent windows on the front of the sensor. Of these, it is the window which s, the right side (when I can stand bottom) compare light with. And it is the window that the left side (when I can stand the upper part) takes in light. |
|---|
 |
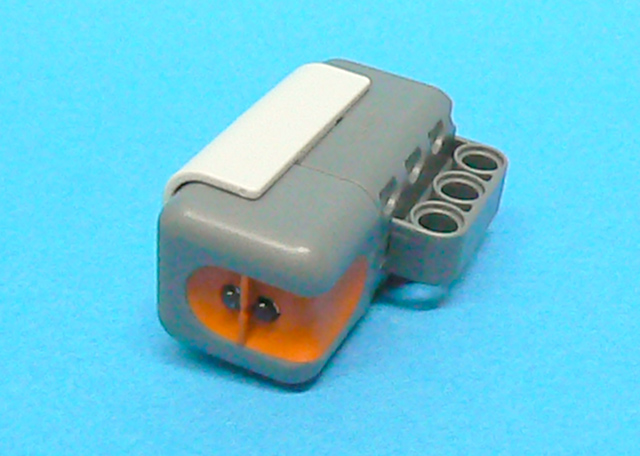
Here, we have components with the same performance as the light sensor. These are the "windows" we have explained to you. The right one is an "LED," which is a component giving off light. An LED is characterized by light radiation when electric current is produced. In terms of shining, it is similar to a midget lamp. Although LEDs have a wide variety of colors and sizes, an NXT has a red LED. The left one is a "phototransistor," which is a component that can sense light. A phototransistor is characterized by electric conduction when receiving light. Measuring the degree of "electric conduction" allows for determining the amount of light. The type of phototransistor used in an NXT reacts to visible light (i.e. light which can be seen with your eyes). |
|---|
 |
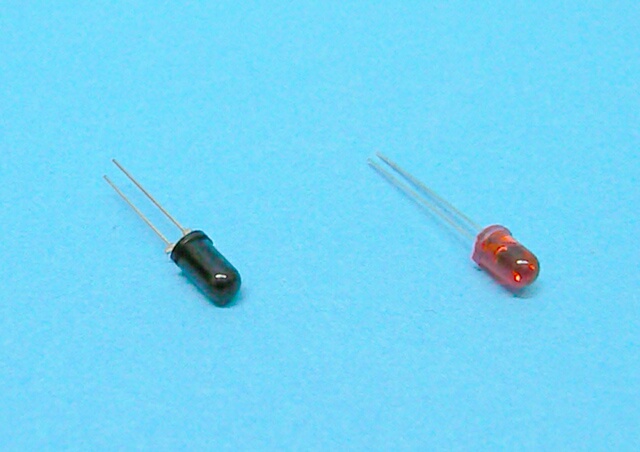
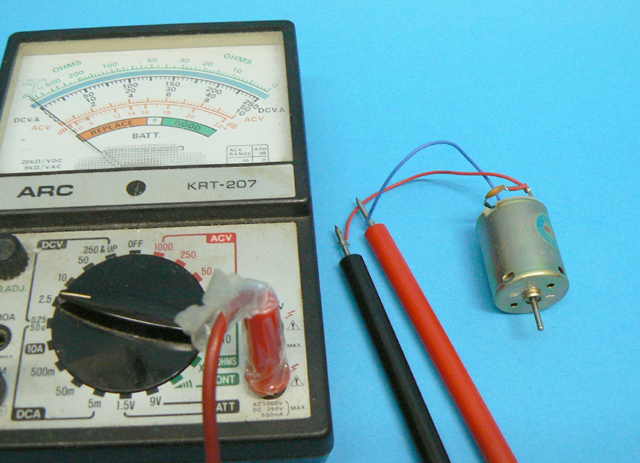
With these parts, I made the circuit of a brief light sensor. The used parts are LED, a photo-transistor, resistance, a bread board, and a battery. |
|---|
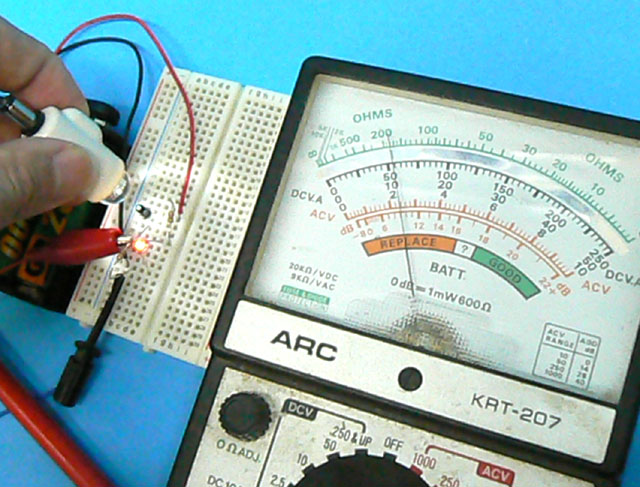 |
LED shined when it carried away electricity to the circuit. And, the needle of the voltmeter is swaying as I exposed a phototransistor to light. It's evidence acting as a light sensor. |
|---|
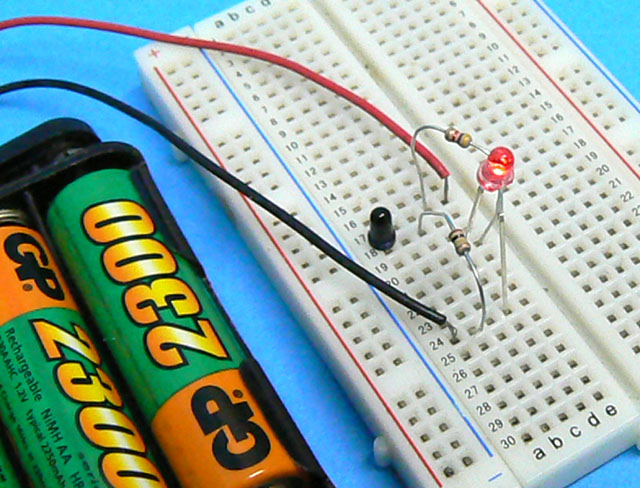
Here's a connection diagram made from this experiment
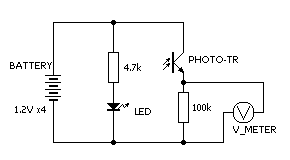 |
Even if you don't know rules of circuit diagrams, you might be able to see that electricity is flowing from the cell toward LED and a phototransistor. |
|---|
In addition, the actual light sensor is carrying out the more complicated circuit. The light sensor circuit diagram is on the LEGO® MINDSTORMS® official page. Http://mindstorms.lego.com/.Since it is opened to the public as materials (LEGO® MINDSTORMS® NXT Hardware Developer Kit) by "NXT'reme", those interested need to have a look.
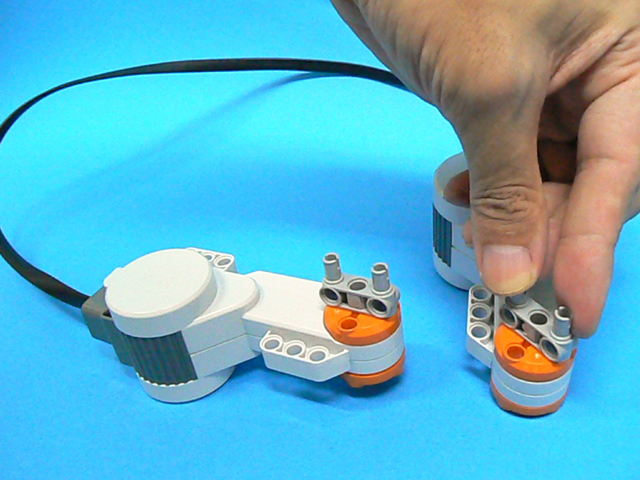
Mechanism of a motor for LEGO® MINDSTORMS® NXT
 |
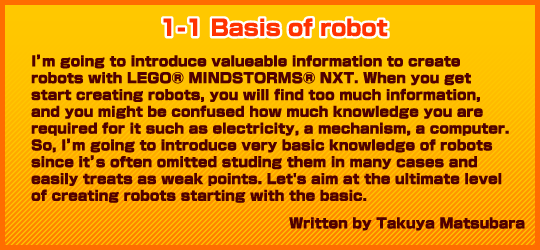
Next, it is about the motor for LEGO® MINDSTORMS® NXT. By what kind of structure is it really moving? |
|---|
 |
Actually, the structure of the motor is drawn on the manual. It's obvious that it has many gears. This gear is for decelerating shaft rotations. Rotating power is strengthened instead of making it slow down. |
|---|
 |
The sensor is attached near a motor axis. This motor can detect speeds and rotational angles. The sensor is used to seek for it. The sensor is combined an infrared LED and phototransistor. Between them, a disk with the gap (slit) rotates, and speed and angle get across to the NXT. |
|---|
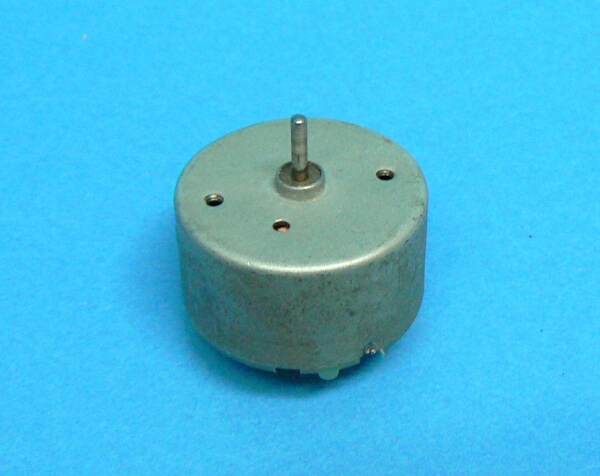 |
Here's the same motor as the NXT carries. It's almost same common motor. Since it's operated on continuous current, it is called a "direct-current (DC) motor." |
|---|
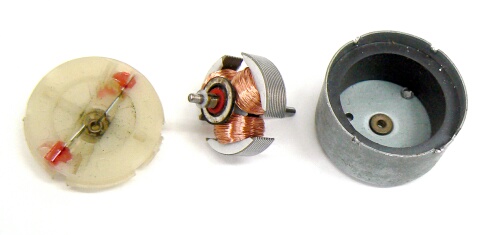 |
I disassembled the motor. An exterior of motor is at the right. The black thing, which exists inside, is a "permanent magnet." The bar magnets is rounded. A thing like central frame calls it a "rotor." It's has three lump of a coil. (it is called three poles). Motor cover is at the left. Please note that two board springs are attached inside a lid. This is called a "brush." |
|---|
 |
By the way, a coil is wind round the conductor. Copper, which it is easy to flow through electricity, is used for the conductor material. Its' surface of a conductor does not conduct electricity, such as enamel and polyurethanes, is applied. |
|---|
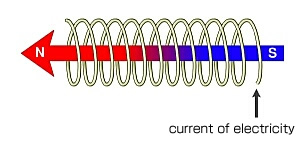 |
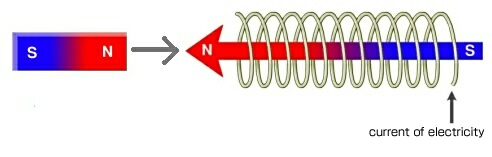
There are interesting properties in a coil. If electricaity is passed in a coil, a magnetic field will occur. If electricaity is passed in direction of the black arrows in the case of a figure, the left side will disguise itself as the magnet with a north pole, and the right sides became a south pole. This is what is called an electromagnet. |
|---|
 |
Let me talk a little about magnet works. There are two kinds of magnets, "a north pole" and "a south pole." The different sides of poles are mutually drawn near (suction), but the same sides of poles are separate (backlash). It is a wonderful phenomenon. Although what the field lines has come out from a north pole toward a south pole (the magnetic field has occurred) is understood, nobody knows how it works as power. |
|---|
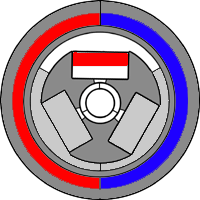
Details; the content of motor
 |
 |
|---|---|
|
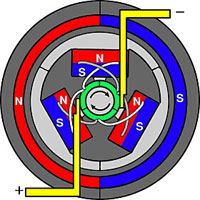
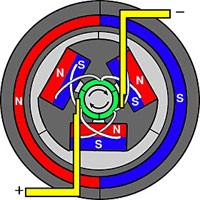
Yellow; the brush- electrical flows. Green; a contact which a brush hits. Electricity flows into a coil through a contact, and magnetism occurs. Red and blue: magnetic state. These two kinds of figures represent a relationship between a rotor angle and magnetism. Whenever it rotates at 60 degrees, one of coils of the N pole or S pole have changed. |
|
| Since it is very puzzling, I observe only one of three coils. It is a situation when a rotor is turned clockwise by a unit of 60degrees. | |||||
 |
 |
 |
 |
 |
 |
|---|---|---|---|---|---|
| If a coil comes above the half of a motor, it will become a north pole. And, the other will become a south pole if it comes below a half. | |||||
 |
Here's an animation with six figures as above. The motor is turned because a coil repeats suction and backlash well. In addition, although only one coil is drawn in this figure, three coils have switched to a north pole / a south pole each time. |
|---|
Now you know;
A motor contains coils
A motor is turned by magnetism.
Dynamo
You might say "so what?" to the fact, which a coil is contained in a motor. I want to show you a result that a motor becomes a generator.
 |
I experiment by a motor for DIY. This motor, which is connected with a voltmeter and a motor axis, is turned with sufficient vigor in a finger. Then, a needle of a voltmeter moves. This is an evidence that electricity was produced from the motor. |
|---|
 |
And this is the manual power generator currently that sold at Akizuki Denki Tsusho. If a grip section is grasped, electricity occurs, a light can be turned on or a mobile can be charged This generator has also made electricity by a thing like a motor being contained inside, and rotates it. Also, the generator in plants and the motor used in the previous experiment are powering by the same principle. |
|---|
| The structure is how electricity occurs as follows; |
 |
|---|
| If a magnet is moved to or from a coil, electricity will occur. It is electromagnet and reverse action. This phenomenon is called "electromagnetics induction." Mr. Faraday of Britain found it for the first time in the world in 1831. It will be an old thing generally about in 170. It means that there were no plant could be made, and even a telephone poles would not be stood. The life with electricity is able to be led after the discovery. Don't you think how it's great! |
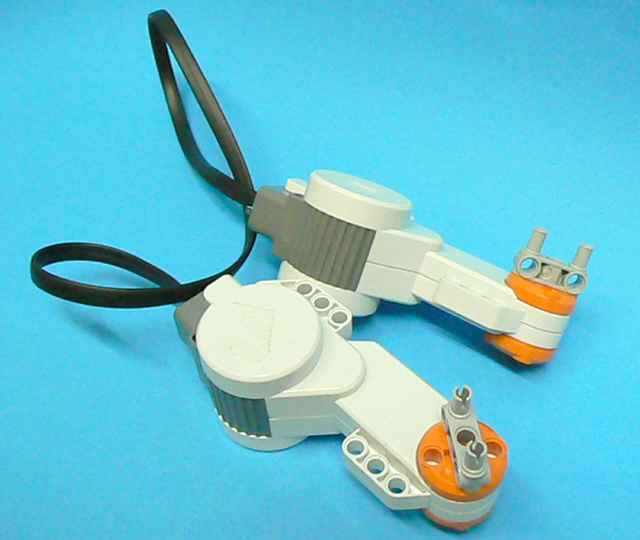 |
Now, let's experiment with the motor for the NXT. Two motors for the NXT are prepared. A cable ties the two motors, and The rest parts are used to make wheels. |
|---|
 |
If you start to turn in a motor, it will already begin to turn of itself. Then you will find out that the motors and generators are the same structures now. *please turn the gear gently by hands, since it's under the overload. please remind that it's not the recommended way. |
|---|
What's electric?
 |
By the way, what is "electricity"? Electricity is moving electrons. An "electron" is contained in an atom and it has stuck to the surroundings of the nucleus (I don't have further details). An electron may separate and may be moved from an atom core. This is called a "free electron." |
|---|
 |
Ease of separating electrons depends on an atom. Based on the combination of certain atoms, a substance has a powerful mixture whether it passes electricity or not. The substance is called a "Semiconductor." Semiconductor can be used for memory and calculation. Many semiconductors are used for the "microcomputer", which is the brains of the NXT. |
|---|
How to make an monopole motor
As your additional information, I'm going to make a motor by myself, so that I will be able to know the stricter more.
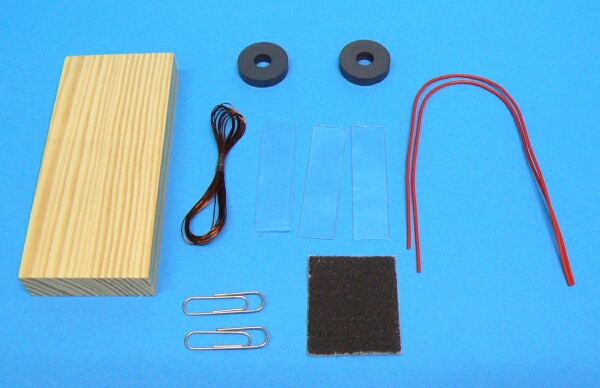 |
Material; a board made of a wooden board, an enameled wire, a permanent magnets, clips, leads, sandpaper, and resin. This photo is contents of construction kit "Children Experiment Series 9". You can buy at the shop DAISO for 105-Japanese Yen. If you couldn't find it, please look for equivalent parts in other shops such as TOKYU HANDS etc. |
|---|
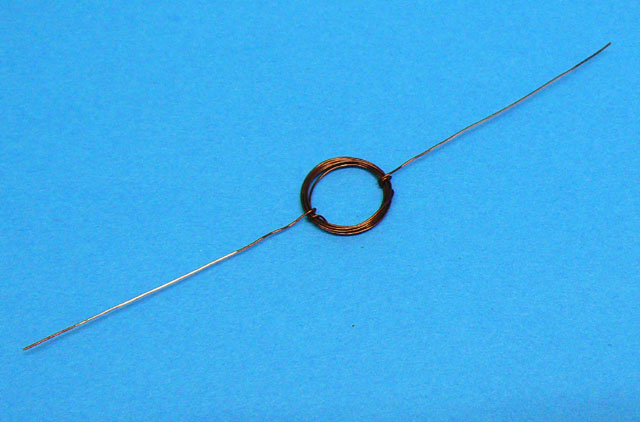 |
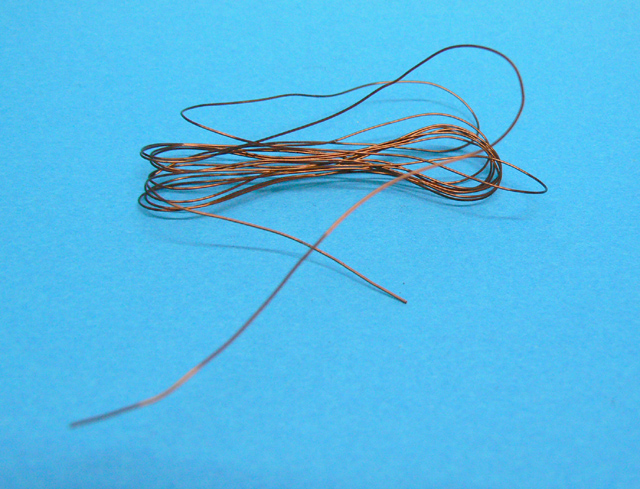
Let's make a coil first. After coiling enameled wires about 10 times, the both ends are stopped as a form of this photo. |
|---|
 |
An enameled wire is shaved off by spending sandpapers. The part to shave is an erect lead, which the both ends are straight. Between these, please shave only one side of a lead |
|---|
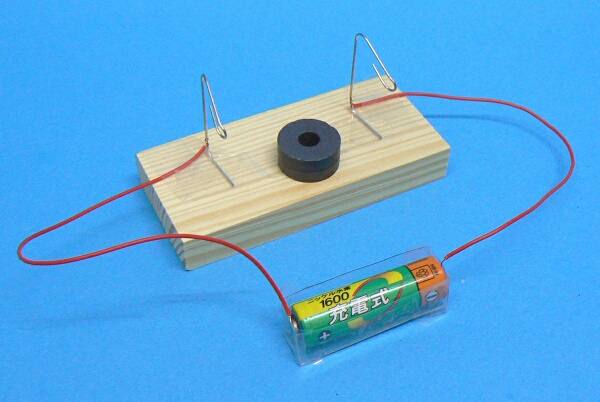 |
After bending two clips, it fixes to a board with scotch tape. The wires are connected with the clips. |
|---|
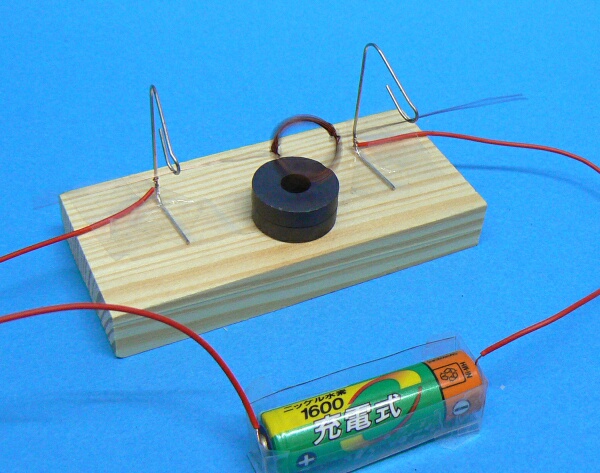 |
Where the coil is put on the clips, a battery is connected to two leads. When a position of the coil is adjusted well, a coil will rotate and it's a success. In order to turn the coil, it needs to get jump-started. Whichever the hand of cuts goes may not be sufficient. So, the coil has a disadvantage to turns to either way. A method of solving this problem is increasing the number of coils. Most motor such as for the NXT prevents turning conversely with coils into three poles. |
|---|


Copyright 2012 Afrel Co.,Ltd. All Rights Reserved.
(R) LEGO, the LEGO logo, MINDSTORMS and the MINDSTROMS logo are trademarks of the LEGO Group.
(C) 2012 The LEGO Group.